Repository hosting & branching strategy
This article provides a comprehensive overview of key aspects in modern software development, focusing on effective repository hosting, branching strategies, the concept of a codebase, and the pull request-merge cycle.

This is Part 2 of the series...
 Hector Sven
Tools and services used...
Setting the stage
This topic can get really big and really fast, that's why I have to be pragmatic and focus on practical rather than theorical considerations with goal in mind: have our our development environment ready to move forward on Part 3 of the series Resilient Azure DevOps YAML Pipeline; nonetheless, I'll give you a reasonable foundation and resources for you to deepen your knowledge.
Section 4. Repository hosting
A code repository is a fundamental and essential component in modern software development for several reasons: version control, history tracking, collaboration, continuous integration and deployment (CI/CD), backup & recovery; a code repository is not just a storage location for your code; it is a collaborative platform that enhances development processes, supports team collaboration, ensures code quality, enables automation, and provides a historical record of the project's evolution.
We will need a version control system (VCS) to implement our code repository and as of today, the most popular is Git and for very good reasons! It is Decentralized & Distributed, Excellent Performance, Open Source, Cross-Platform and it has become the facto Standard in the Industry.
Using an analogy, Git is like Linux OS: same free, open-source OS offered in many distributions (ubuntu, redhat, etc.), some free and other pay and supported; in Git the main distribution platform is GitHub, but I'm going to use the distribution offer by Azure DevOps (AzDO) called Azure Repos Git, the reason why is simple: Integration! I'm also using AzDO Pipelines and Board services, so why having the code someplace else, right? If you want to read a bit more on the subject, I recommend the following article: Azure DevOps vs GitHub: Which DevOps tool is better?
Create our Git Repo
From your AzDO Account/Organization created in Part 1 Azure Account vs DevOps Account; you should be able to see somethin like the example shown below:

When a project is created so it does a Git repository with the exact same name of the Project, we just need to do "Kick off" the repository, click on the Project > Repos and you will see something like this...
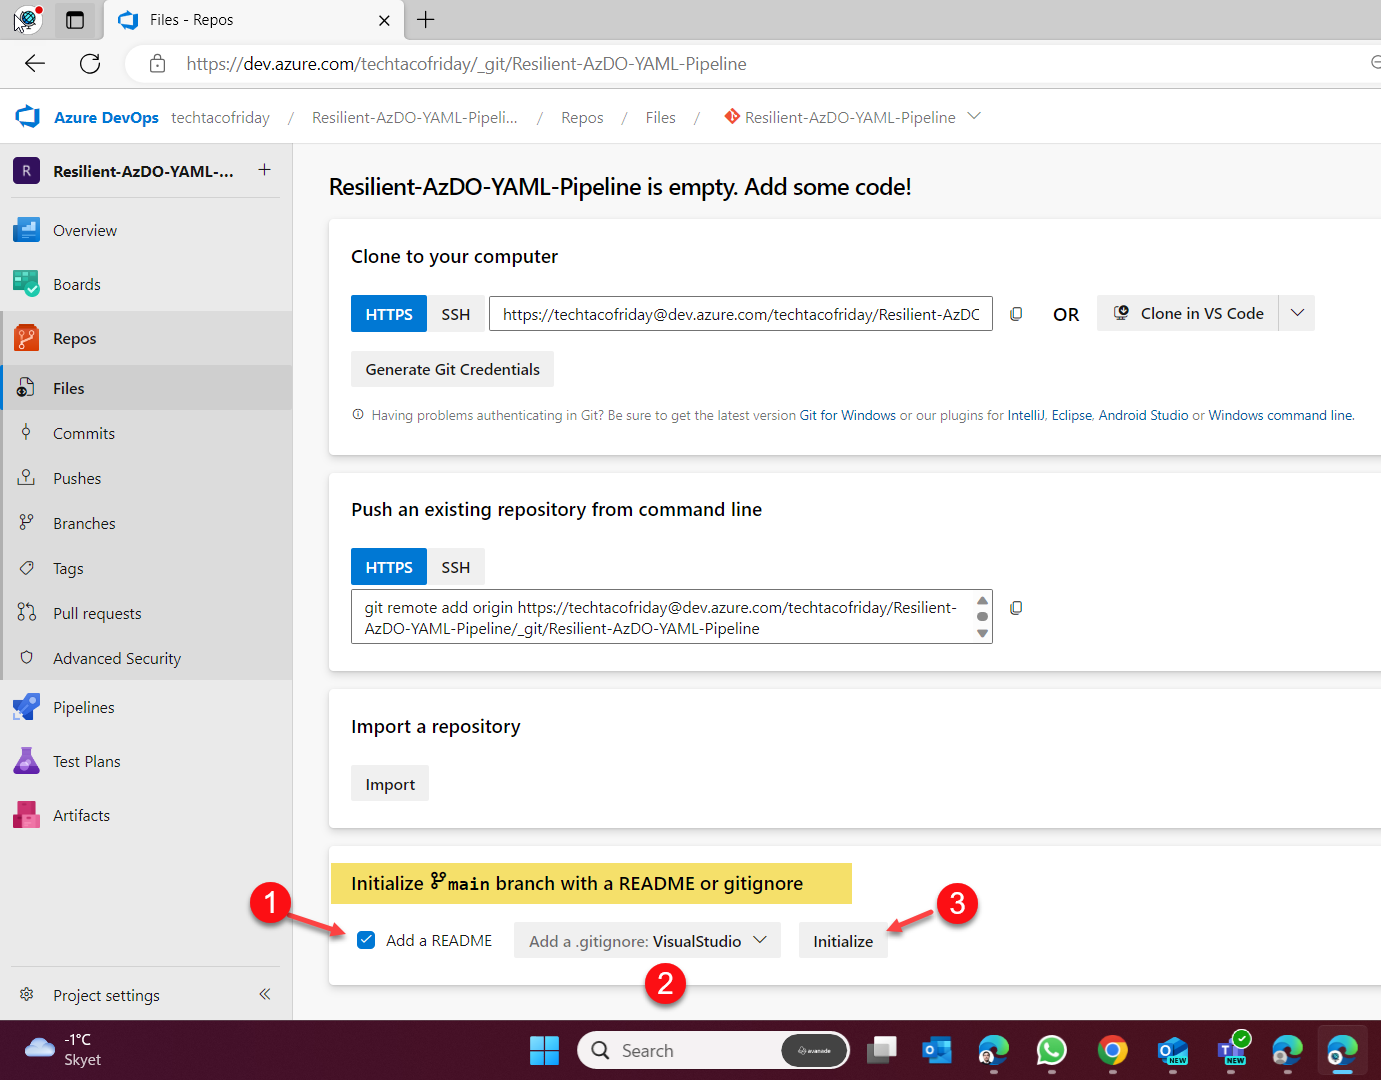
We are starting a repository from scratch, so we are not going to clone, push or import an existing one but just to initialize including a single file call README and a special file called .gitignore
I use Visual Studio (VS) as my preferred IDE, hence, this .gitignore will indicate git to ignore temporary files, build results, and files generated by popular Visual Studio add-ons
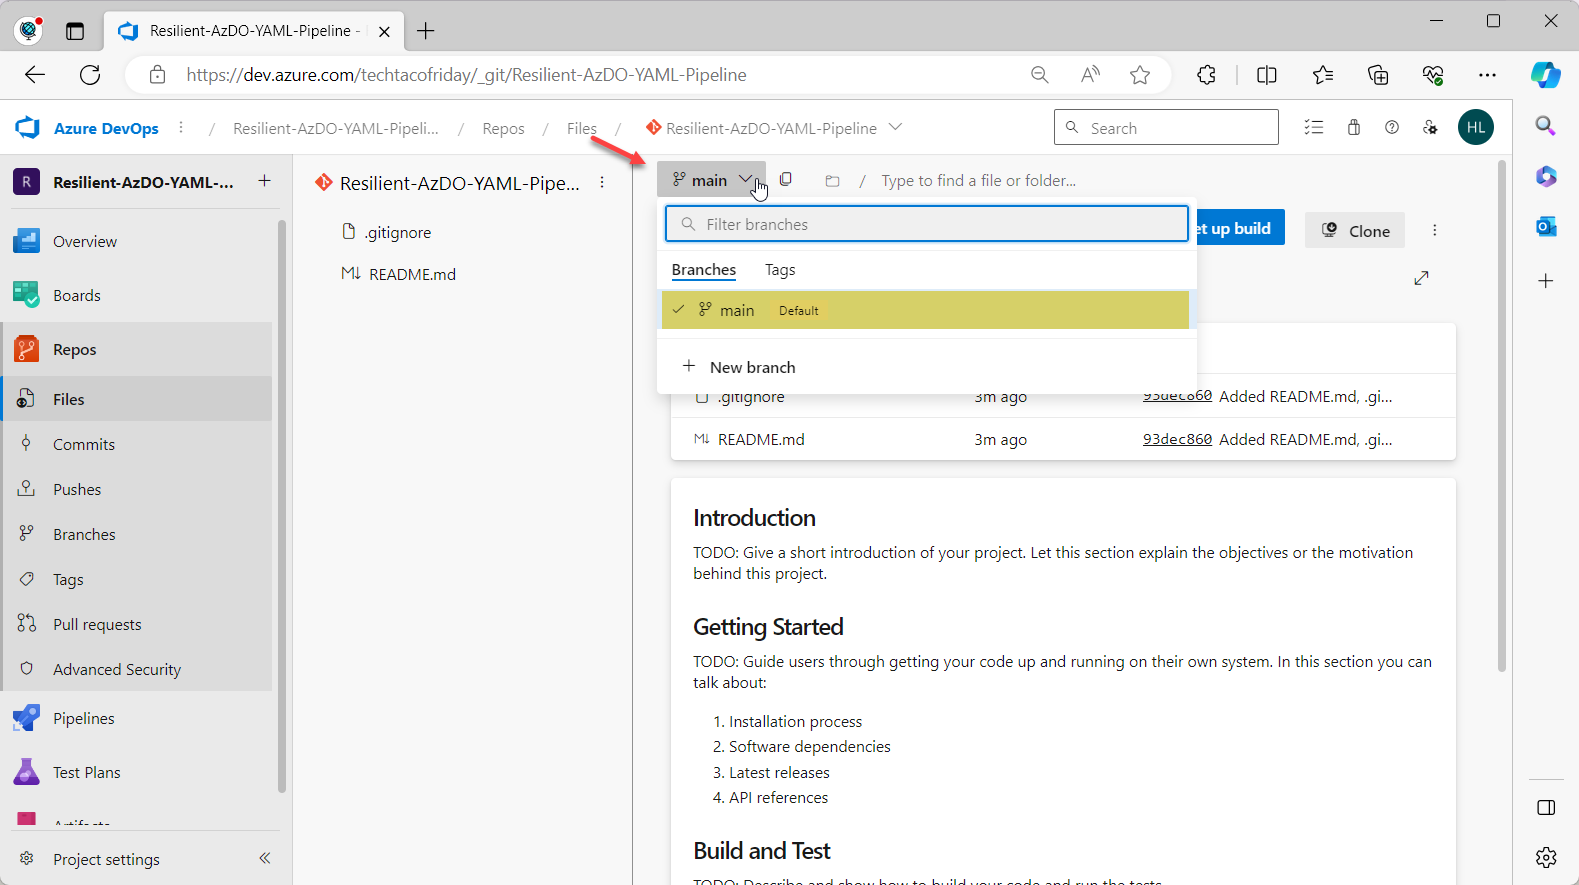
Click on Initialize and you will see something like this, notice the highlighted section, we also have our main branch! I'll explain what this is in the following section.
Branching strategy
A branching strategy is a set of rules or guidelines that dictate how branches are created, used, and merged in a version control system; a good branching strategy helps teams manage parallel development, collaborate effectively, and control the flow of changes in a codebase; take in consideration that the choice of branching strategy depends on the specific needs and workflows of a development team, but for the time being, I'm going to keep things simple and use a feature branching approach... a graphic representation of the strategy would be this:
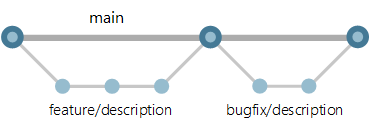
In a nutshell, what this means is that you should always "trust" that whatever main branch contains is the ...
We need to take all necessary steps to prevent faulty code reach our main branch, by simply adhering to our defined branching strategy we can prevent this situation by isolating development into feature branches until the Commits (code changes) are reviewed and its functionality tested.
We initiate this cycle by issuing an operation call "Pull request" to indicate that our code is ready for review and it's finalized with a "Merge" of our feature branch into main... this cycle can be enforced by configuring policies.
Click on Branches, and from the "More options", click Branch Policies
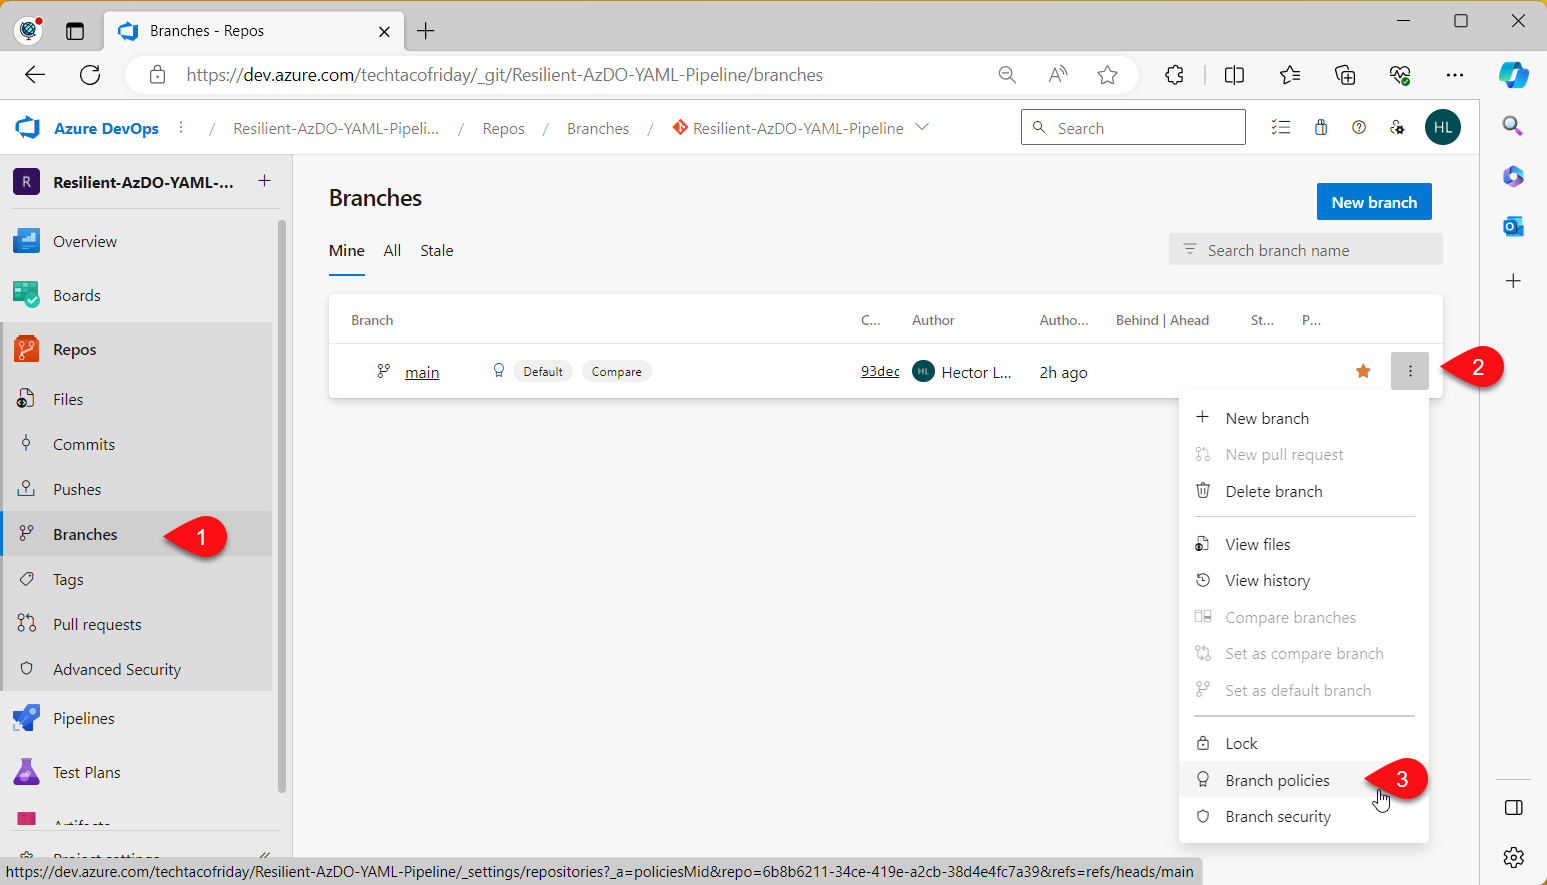
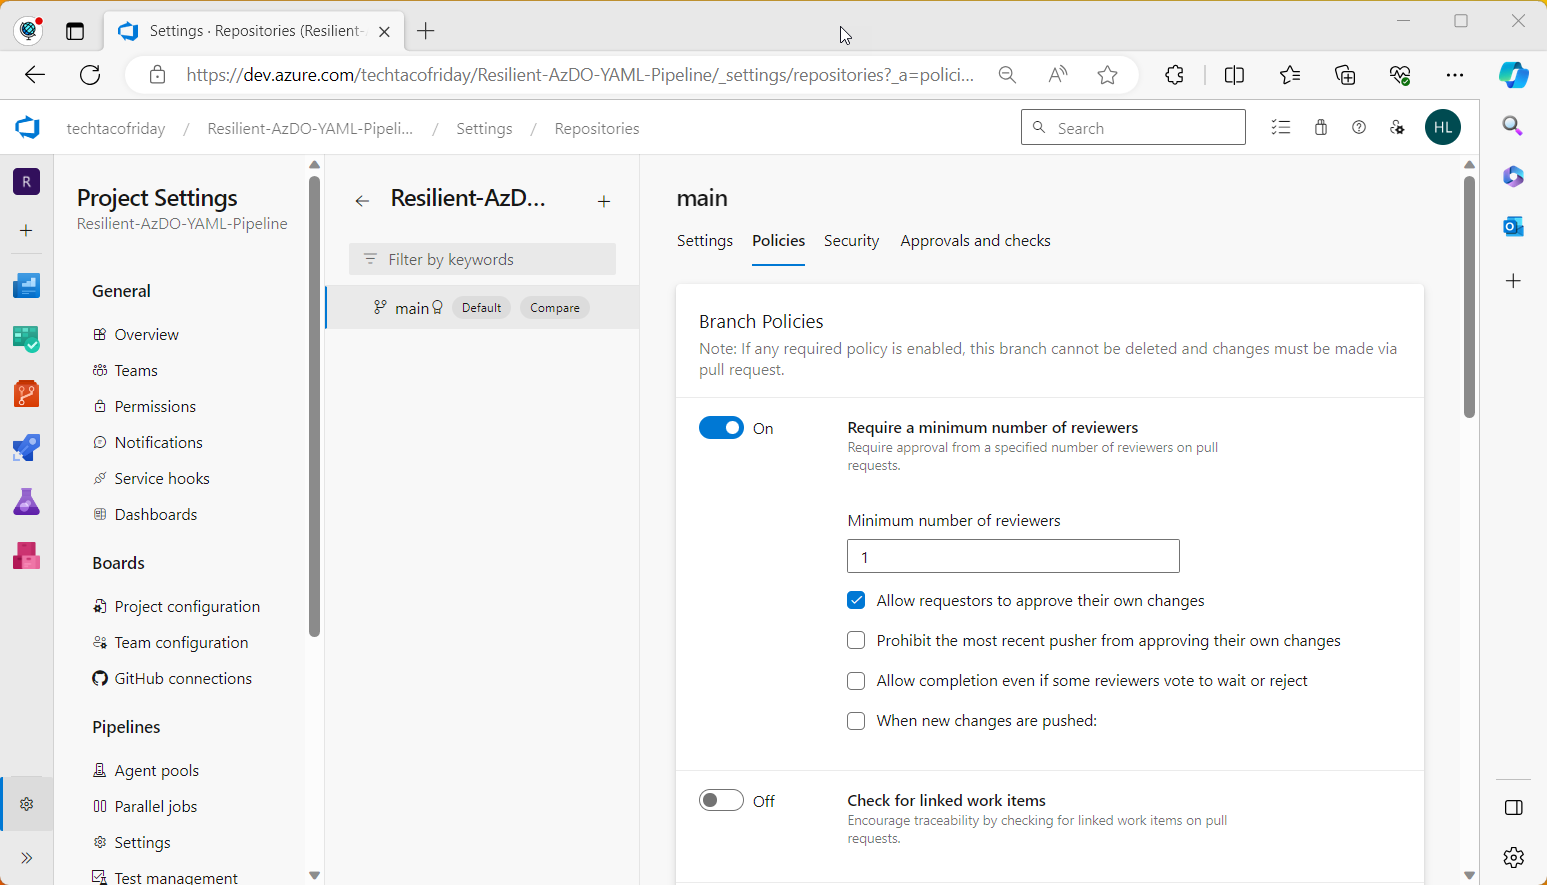
Turn On policy "Require a minimum number of reviewers", this will enforce that any changes will have to be introduced via Commits in a feature branch and undergo the cycle Pull Request > Merge.
In the next section I'll show you how to do this in practice 😁
Section 5. Code base
"Code base" refers to the entirety of the source code and related assets that make up a software project. It encompasses all the files, directories, configurations, and resources that are necessary to build, run, and maintain the software; I chose an example of Infrastructure-as-Code using Bicep to be my code base for this article.
The focus of this article is not Bicep nor Infrastructure-as-Code, so, I won't explain in detail the code, but I'll cover with greater detail in additional articles, so, stay tune and subscribe 😉
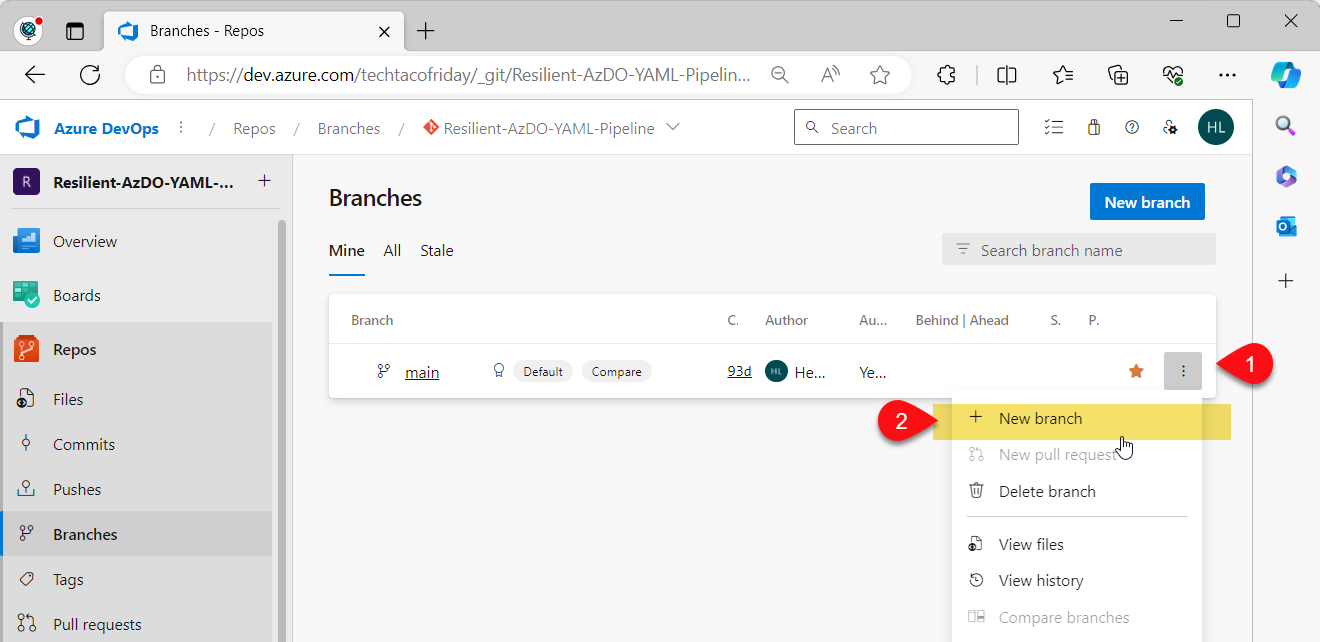
Remember, we cannot change anything directly into main but via a feature branch, hence, let's start by creating a new branch, click from More Actions > + New branch
Choose a name for the branch

I strongly suggest you to use a naming convention, I use feature/YYYYMMDD_<feature name>
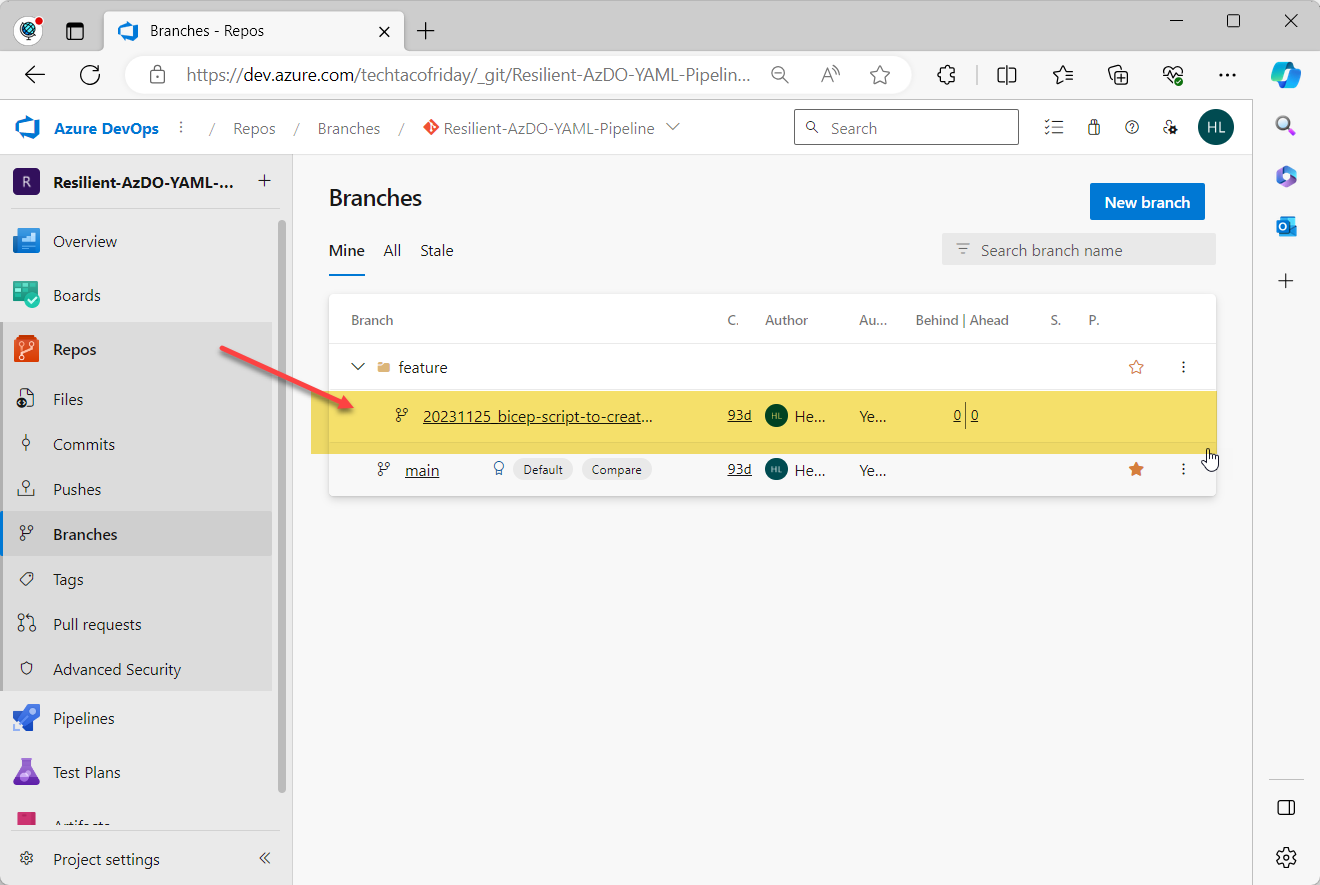
You will see the new branch as shown below, click on it.
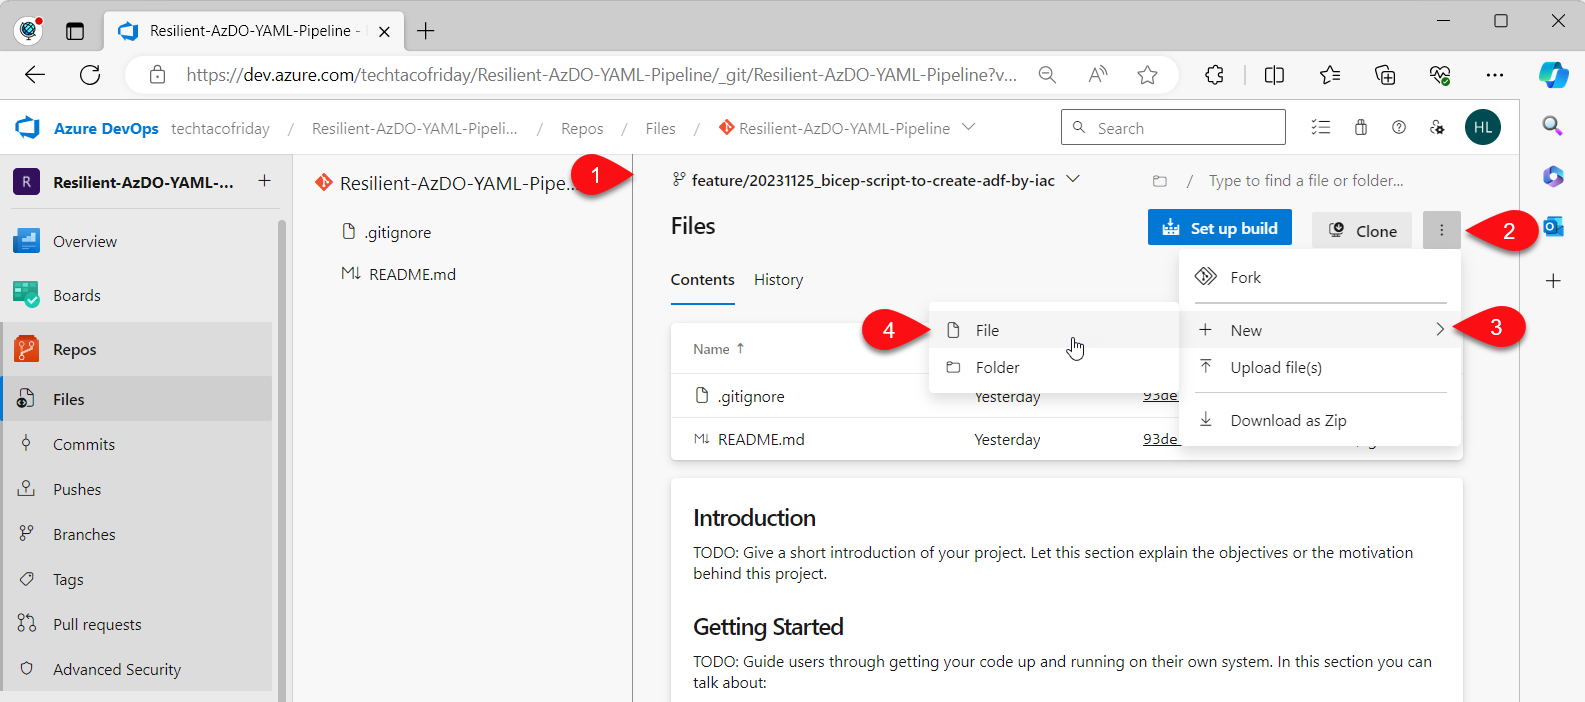
From the new branch, from More Actions, click on + New > File
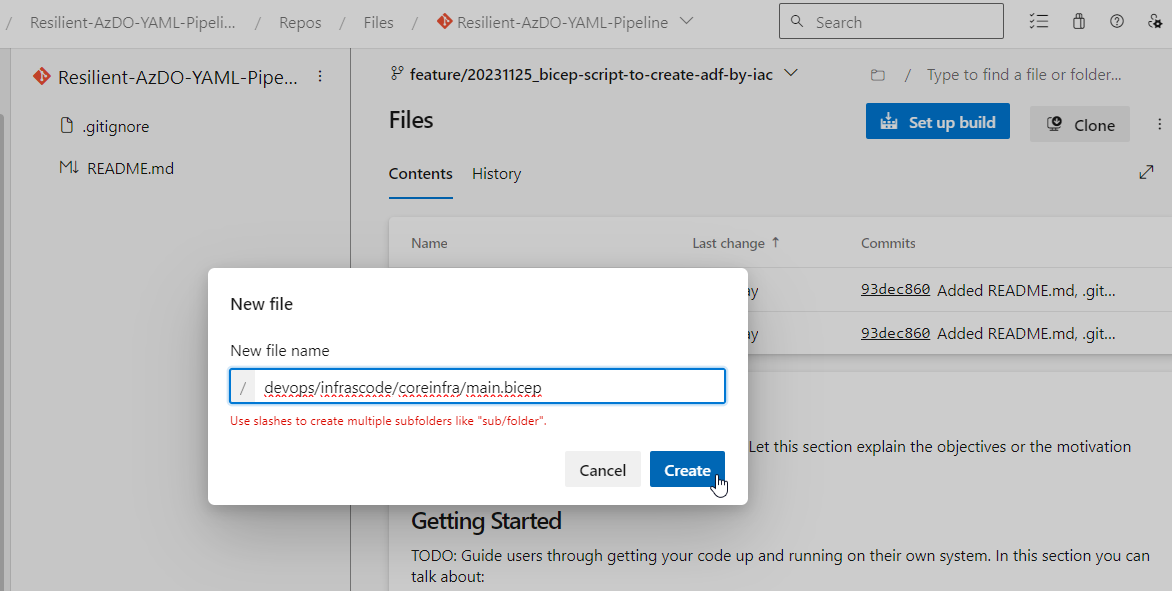
Provide the following path & file name devops/infrascode/coreinfra/main.bicep
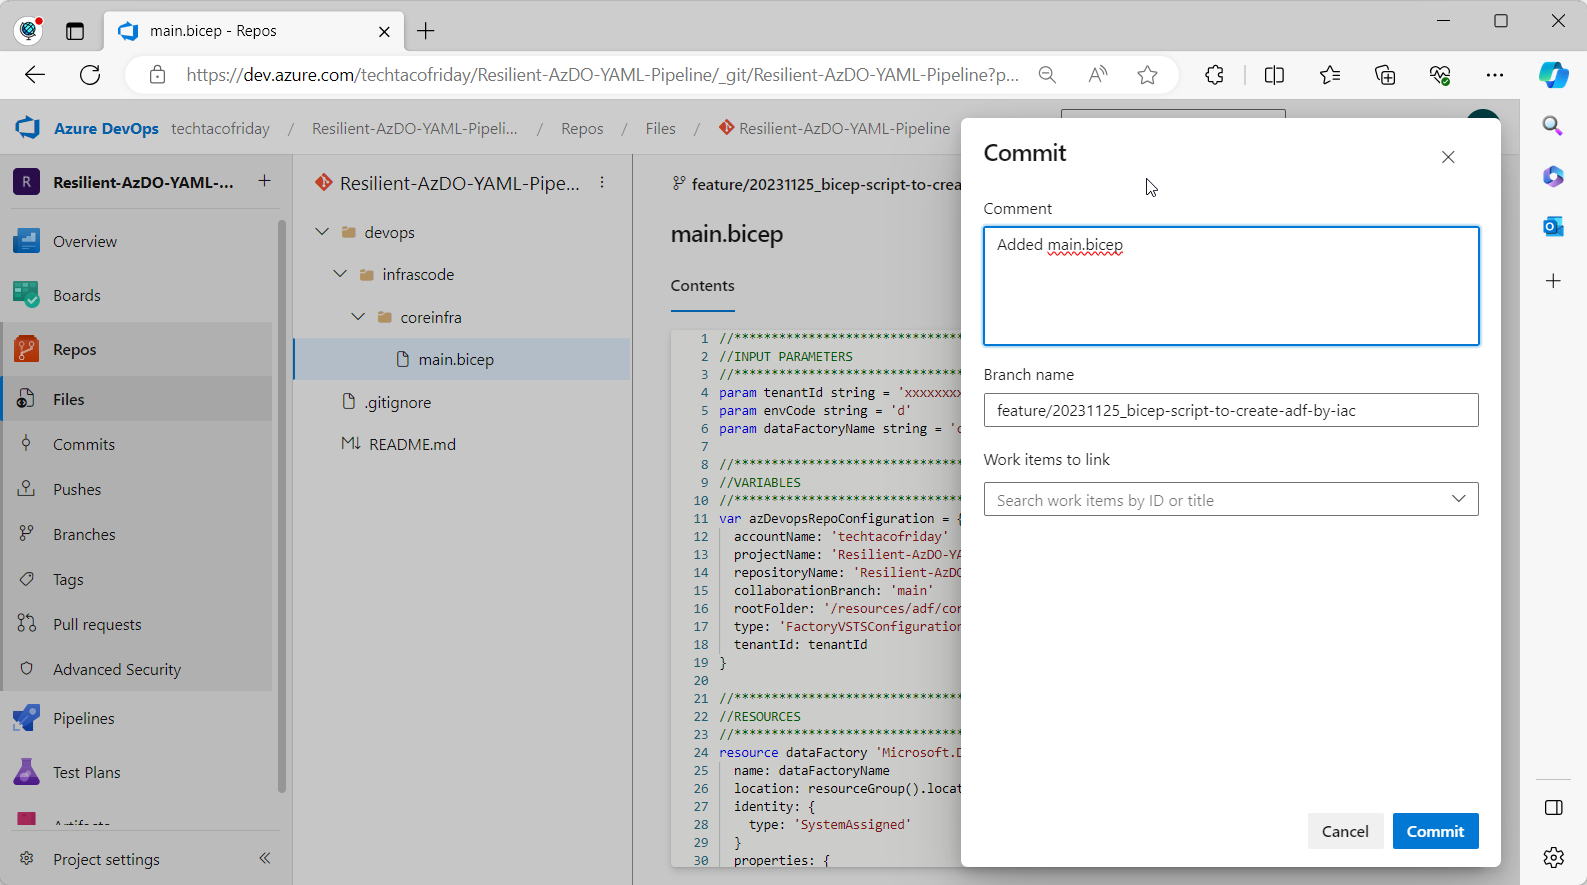
Copy this Bicep code main.bicep into our file and click Commit
//******************************************************************
//INPUT PARAMETERS
//******************************************************************
param azResourceGroupName string = '<name_of_development_resource_group>'
param azResourceGroupLocation string = '<azure_location>'

//******************************************************************
//RESOURCES & MODULES
//******************************************************************
targetScope = 'subscription'

resource resourceGroup 'Microsoft.Resources/resourceGroups@2022-09-01' = {
  name: azResourceGroupName
  location: azResourceGroupLocation
}
This file will create a new Resource Group in your subscription, I explain in detail more on BICEP in this article, check it out!
 Hector Sven
Provide a comment that indicates what is the nature of our change and click Commit.
Pull request > Merge cycle
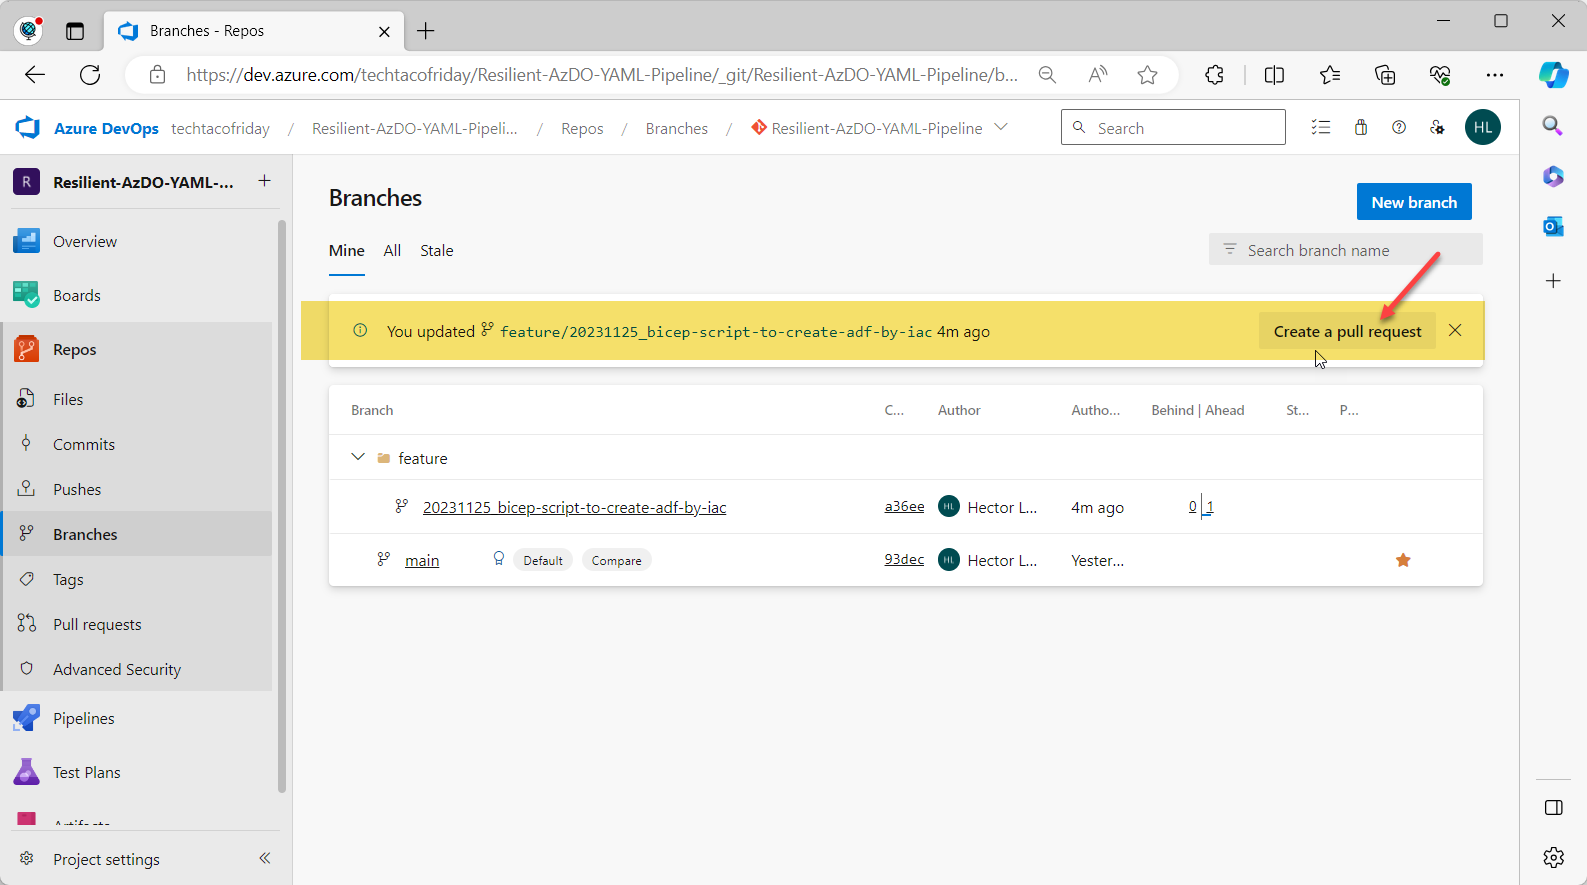
If you go to Branches, you will be warn about changes introduced to your feature branch, there will be also a button to Create a pull request, how convenient! Let's click it.
From About pull requests: "Pull requests let you tell others about changes you've pushed to a branch in a repository on GitHub. Once a pull request is opened, you can discuss and review the potential changes with collaborators and add follow-up commits before your changes are merged into the base branch."
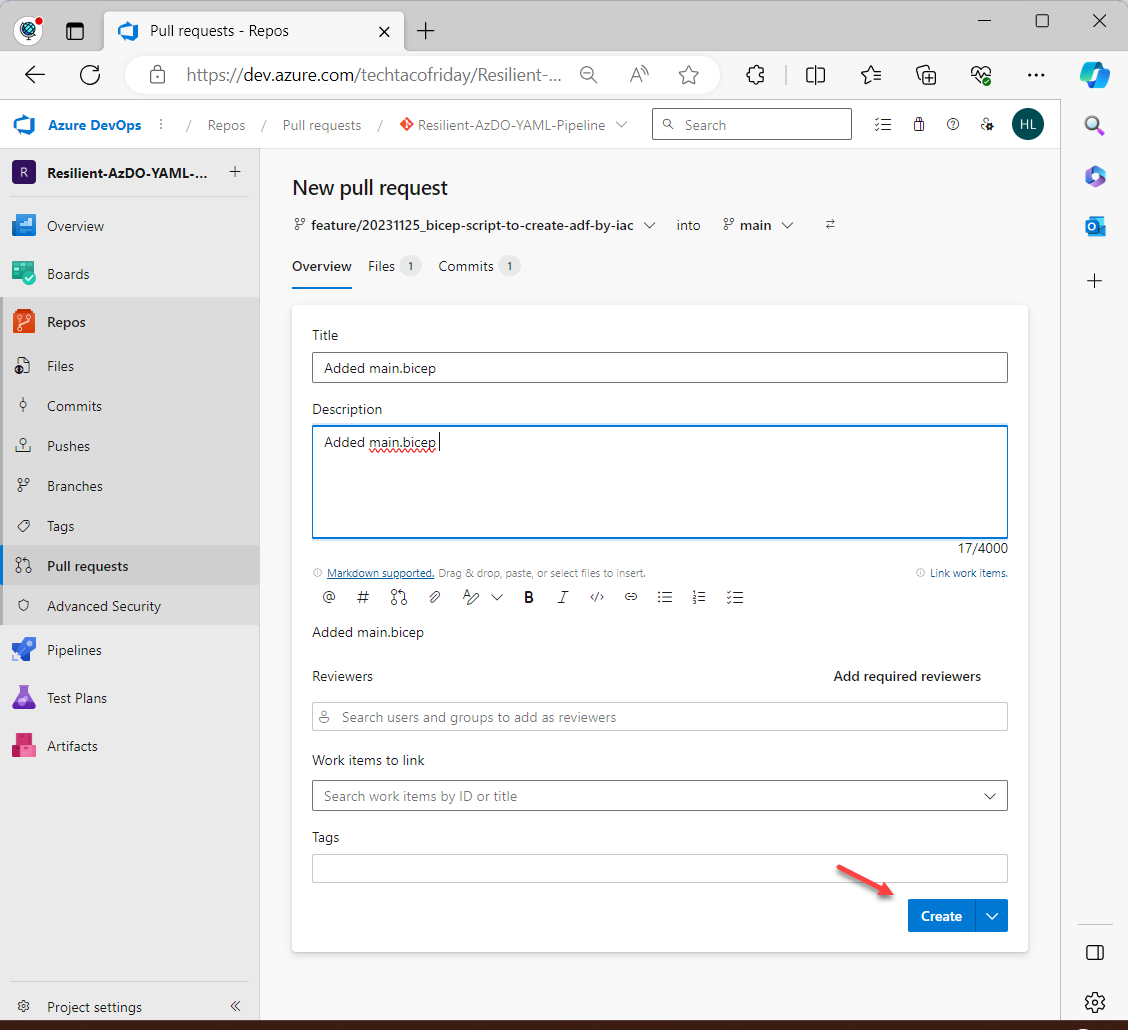
Provide all relevant information about the change and click Create
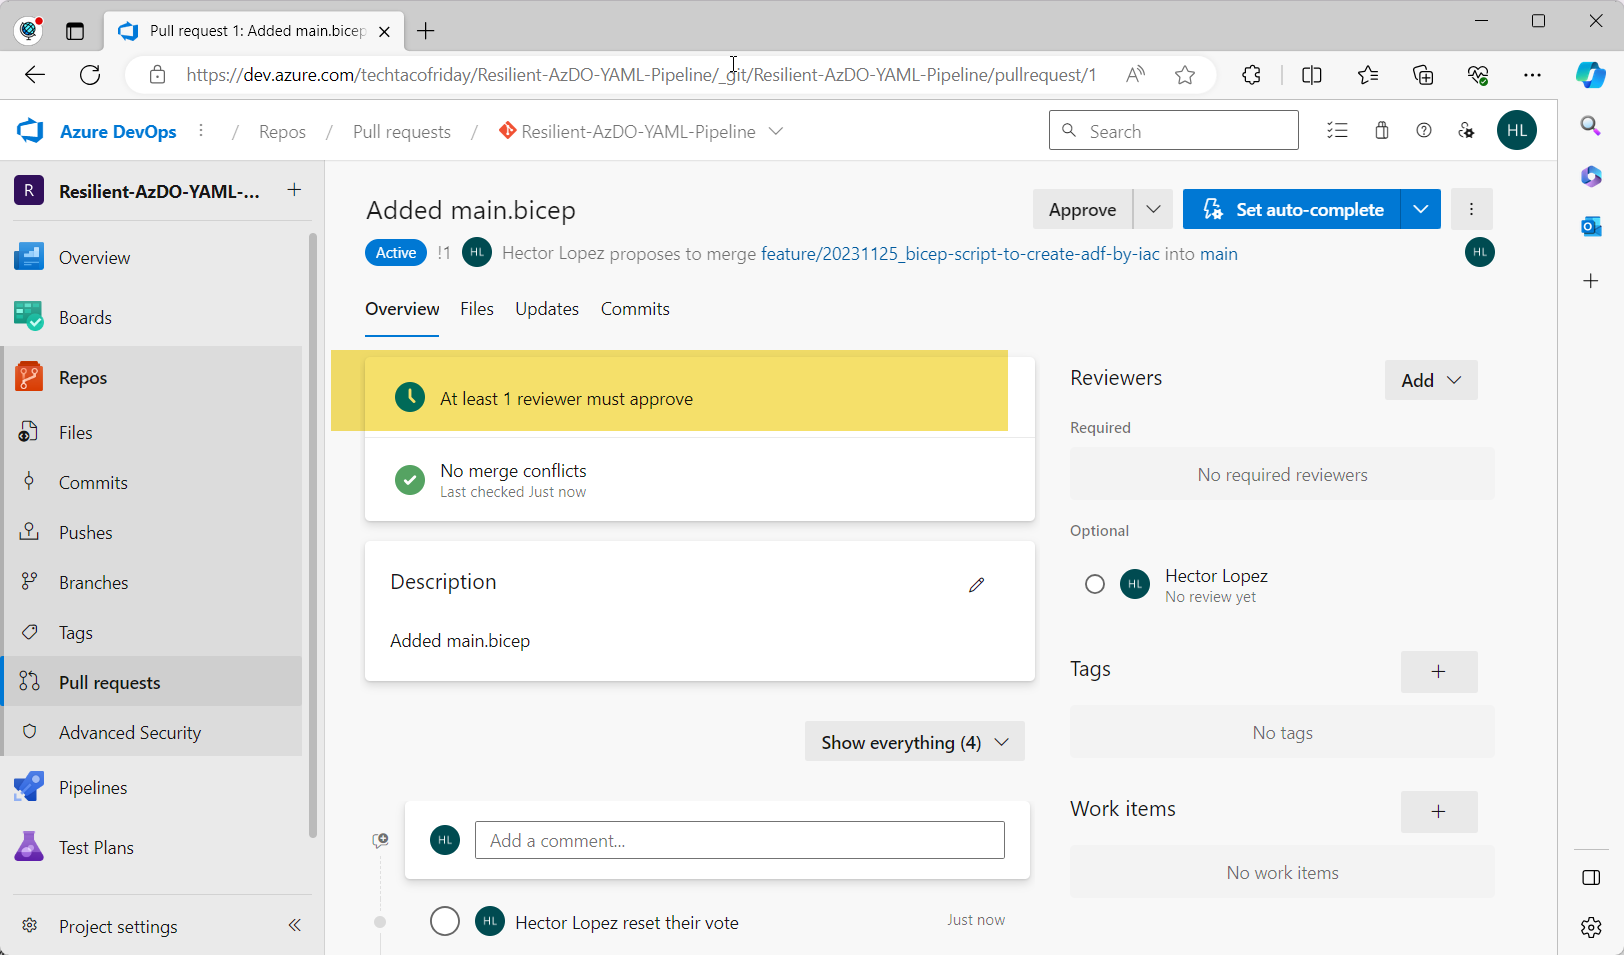
Remember the policy configured for main branch on Section 2? Here we can see it will enforce any conditions we deem adequate to ensure only quality code to be merge into main; click Approve and Complete afterwards.
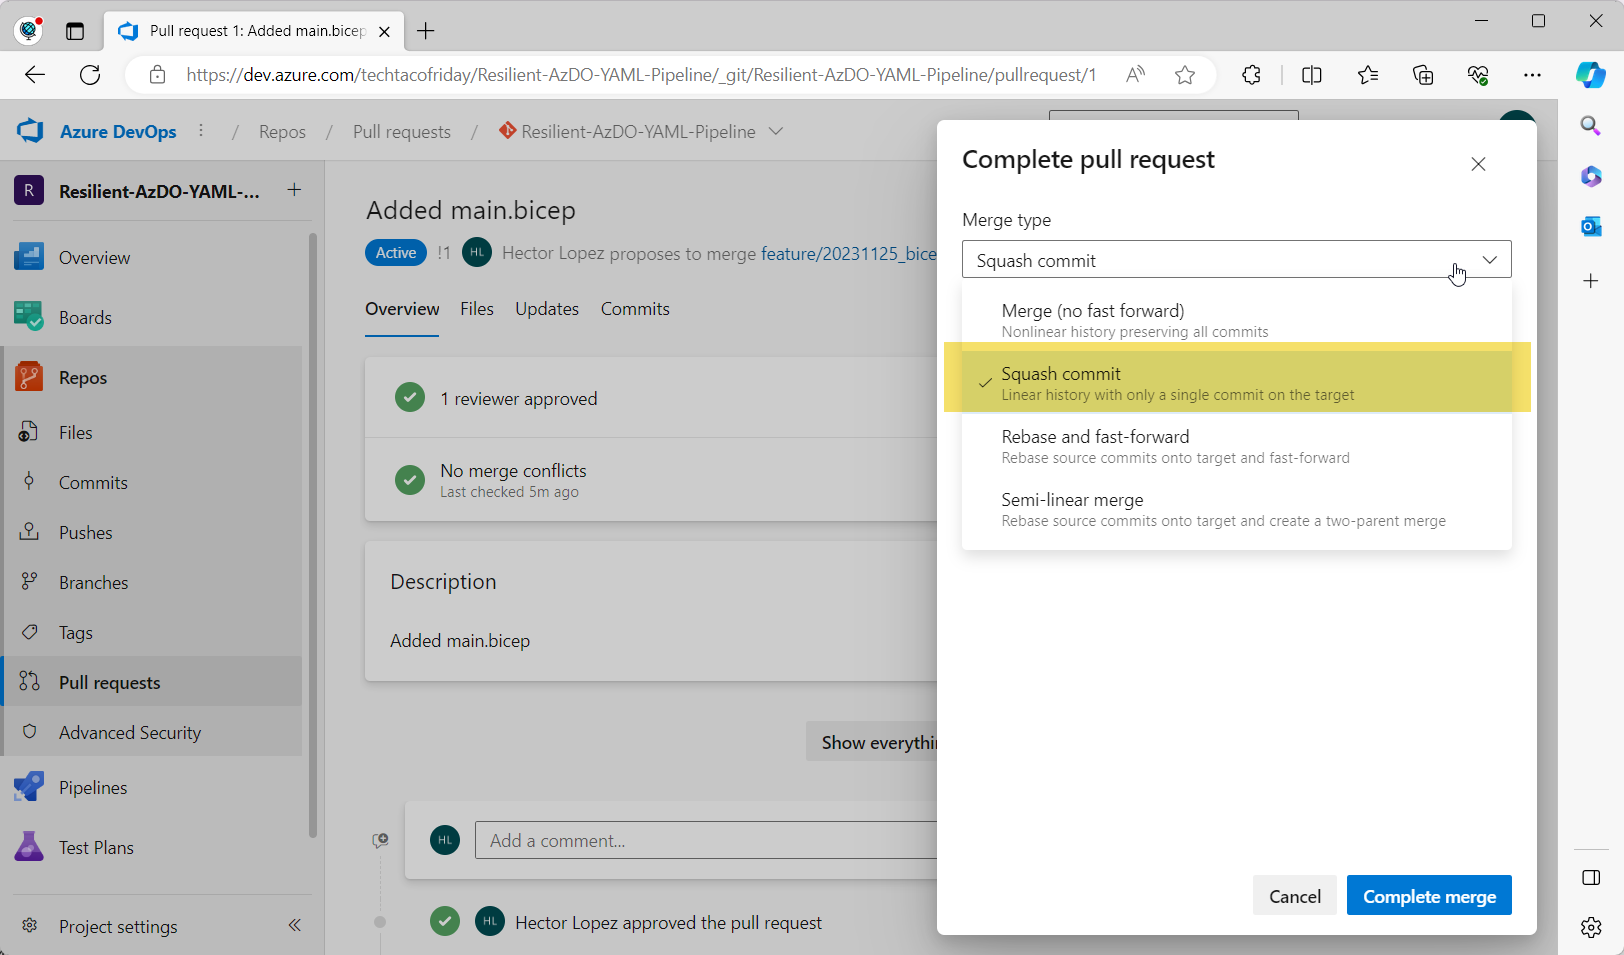
You will see various Merge types available, for the time being, use Squash commit and click Complete merge.
In my case, the Merge was Completed and the feature branch was merged to main with the changes and the cycle is now complete!
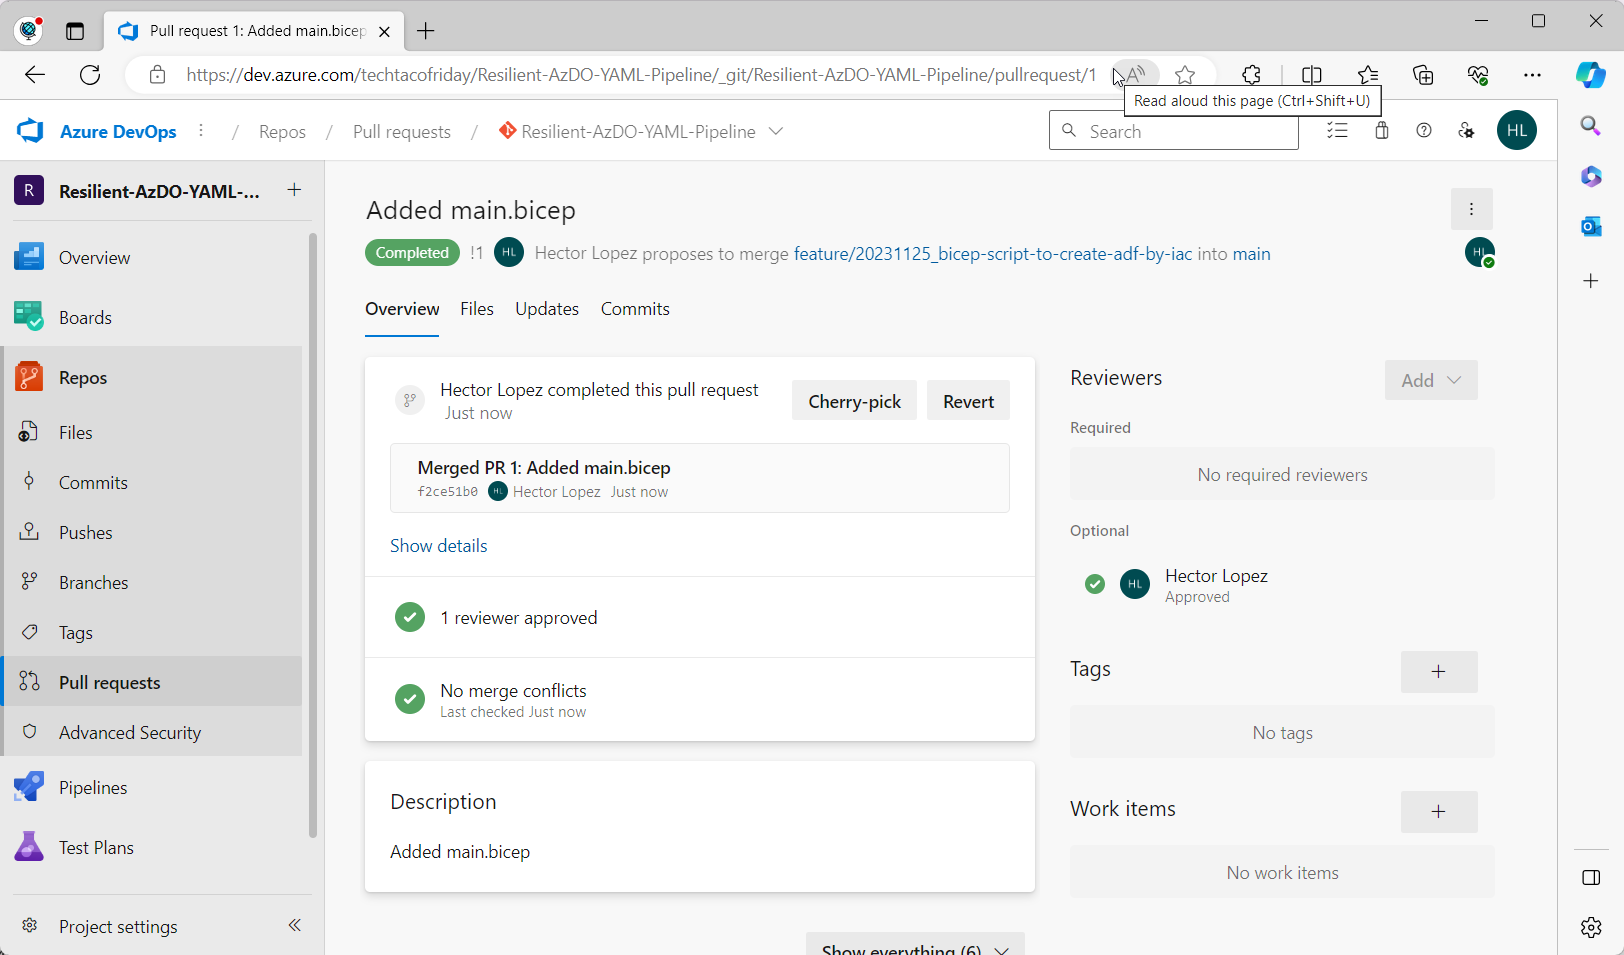
And now the cycle is complete! Any additional changes are to be introduced again by adding a new feature branch originated from main, commit & commented, submitted thru a pull request and merged.
Assuming we have two resource groups, one for development and other for production, expanding our branch diagram into processes (P), events (E) and decisions (D) should now look like this:
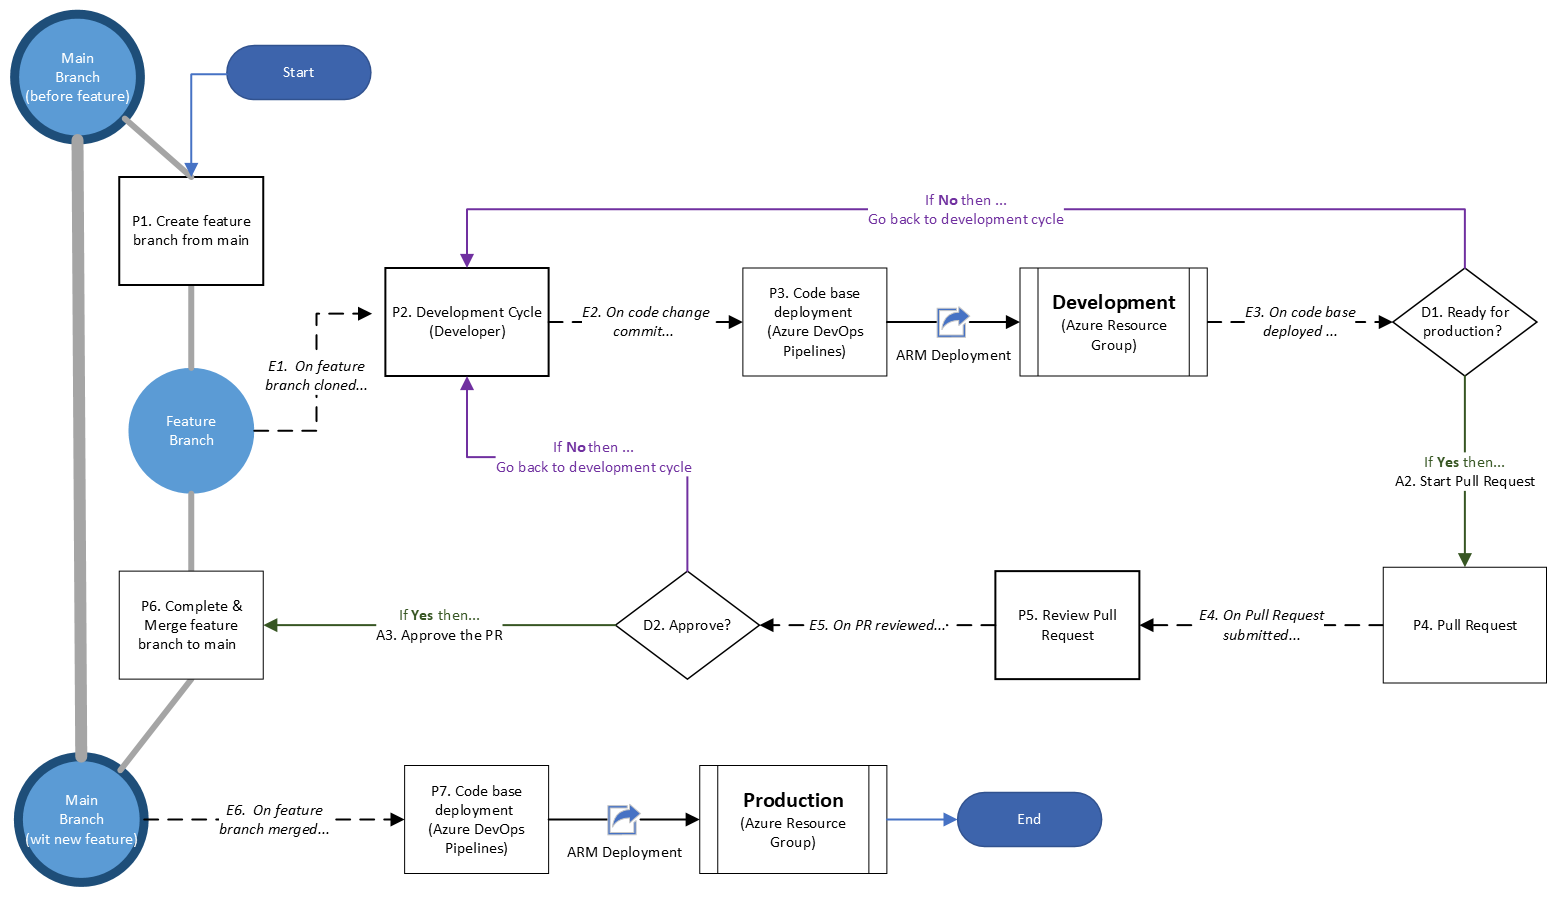
With our comprehensive flowchart in mind, join me in Part 3 of the Resilient Azure DevOps YAML Pipeline series. Discover how this intricate process seamlessly aligns with key principles of modern software development—Continuous Integration, Continuous Deployment (CI/CD), and the Agile methodology.
So stay tune! If you want to receive directly into your inbox, subscribe 😊👍 ... vi ses! (see you in Norwegian!)


