Resilient Azure DevOps YAML Pipeline
Embark on a journey from Classic to YAML pipelines in Azure DevOps with me. I transitioned, faced challenges, and found it all worthwhile. Follow to learn practical configurations and detailed insights, bypassing the debate on YAML vs Classic. Your guide in mastering Azure DevOps.

Welcome back, this is part 3 of the series ...
 Hector Sven
Couple of things you should know...
This is not a tutorial on Yaml I will explain only the code contained in the pipeline; it won't be a tutorial on Git or Visual Studio (VS) I'll comment only on the main operations such as Clone/Pushing a branch and the images I'll show from VS are use for reference only.
Tools and services used...
- Azure and DevOps Accounts
- Visual Studio Community 2019 (minimum). Any higher edition or version would be even better.
Setting the stage
As outlined in the series introduction, my journey with Azure DevOps (AzDO) began with the Classic framework, as per the terminology used in Microsoft's documentation. However, shortly thereafter, I made the pivotal shift to YAML Pipelines, and I've never looked back. This switch involved the inevitable task of rewriting existing pipelines and investing time to understand and adapt to this new approach. Despite the expected need for pipeline refactoring, I firmly believe the investment was worthwhile.
If you've chosen to follow this article, it's likely because you're convinced or have taken the word from someone who has navigated this transition—me. Instead of delving into a comparison of YAML versus Classic versions or the advantages of one over the other, I'm here to guide you on configuring a functional YAML pipeline. My focus is on demonstrating how to set it up and providing a detailed explanation of its workings so that you can effectively implement it for your projects.
Modern software development practices
Continuous Integration and Continuous Deployment (CI/CD) are closely related to the Agile methodology, forming a symbiotic relationship in modern software development practices.
Agile is an iterative and incremental approach to software development, it aims to deliver small, functional increments of software quickly and regularly, allowing for rapid adjustments based on changing requirements.
CI/CD is a set of practices that automate the process of integrating code changes (Continuous Integration) and delivering those changes to production (Continuous Deployment). These practices align seamlessly with Agile principles by facilitating the rapid and frequent delivery of software updates.
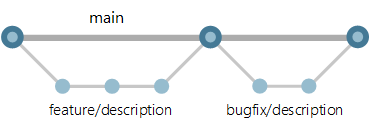
Using a feature branching strategy...
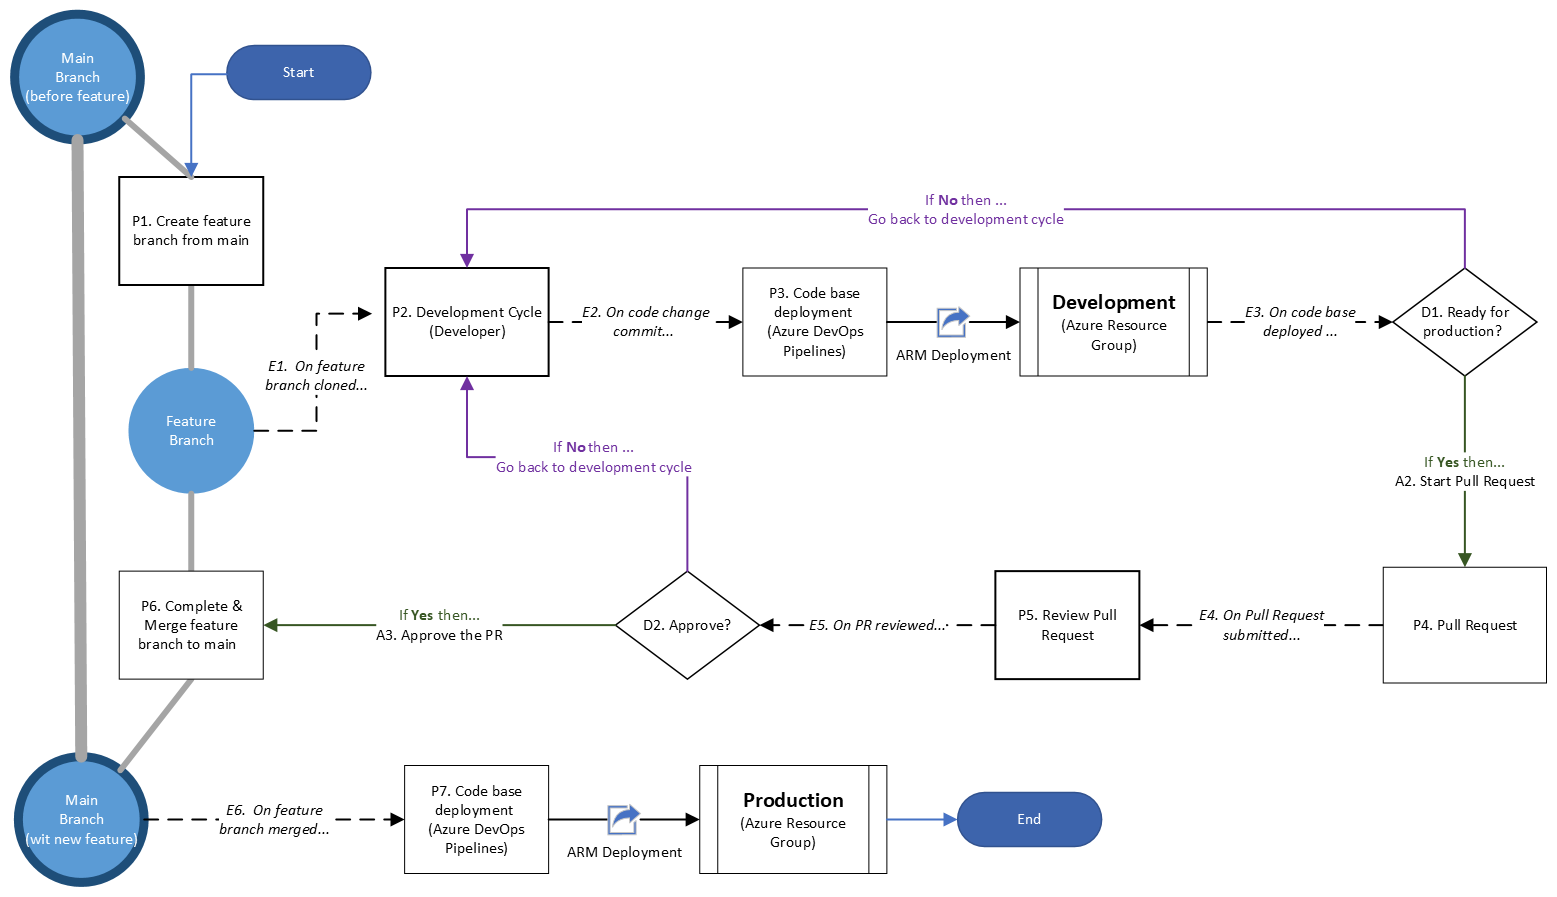
Applied to a two-environment configuration, Development (P) and Production (P) and using an Agile approach, our modern software development workflow will be like this!
Section 6. AzDO Service Connections
Assuming that you have your AzDO Organization connected with your Azure account (I show you how to do this on Section 4. Bridging the gap from Part 1) we need to have the following items ready before moving forward:
- Subscription Id and Name (From your Azure Account go to Subscriptions)
- Have an application in Azure Entra ID (formerly know as Azure Active Directory) registered and add a secret to it
- Grant Contributor role to the Azure Entra ID application to your Subscription
Go to your AzDO project and from Project Settings/Service Connection/Create service Connection and choose the Azure Resource Manager > Service principal (manual), provide requested information kind of like this ...
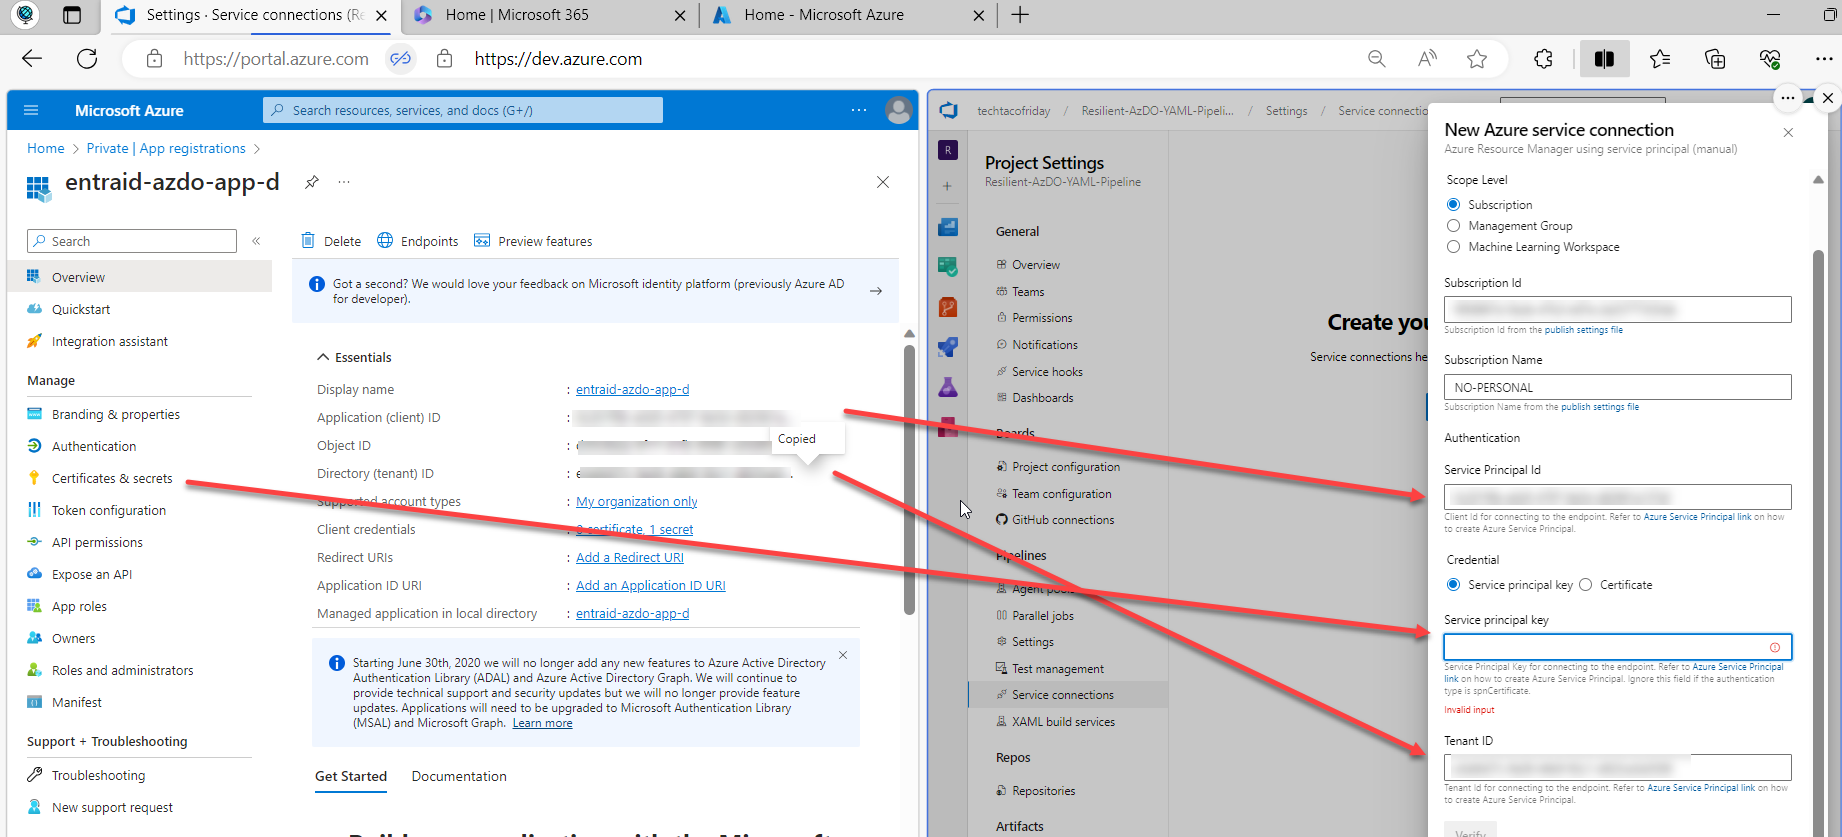
Click Verify and Save.
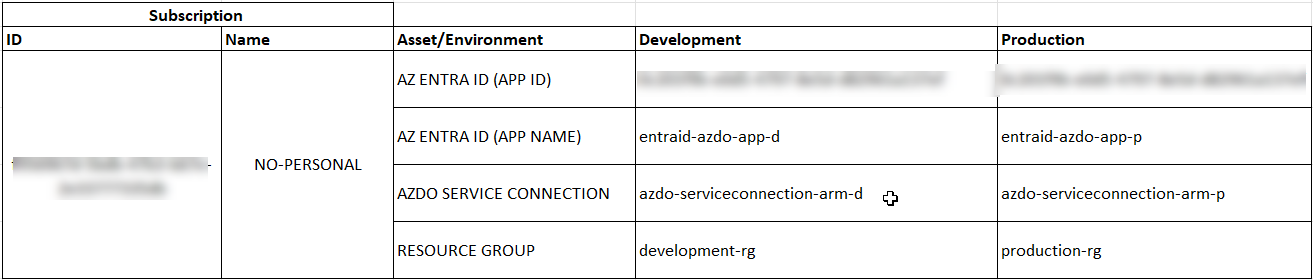
Perhaps in more realistic setups, both develop and production have different subscriptions, in this case, we are just going to use one subscription but different resource groups to deploy Development from Production resources separately; if summarized in a table, would look like this...
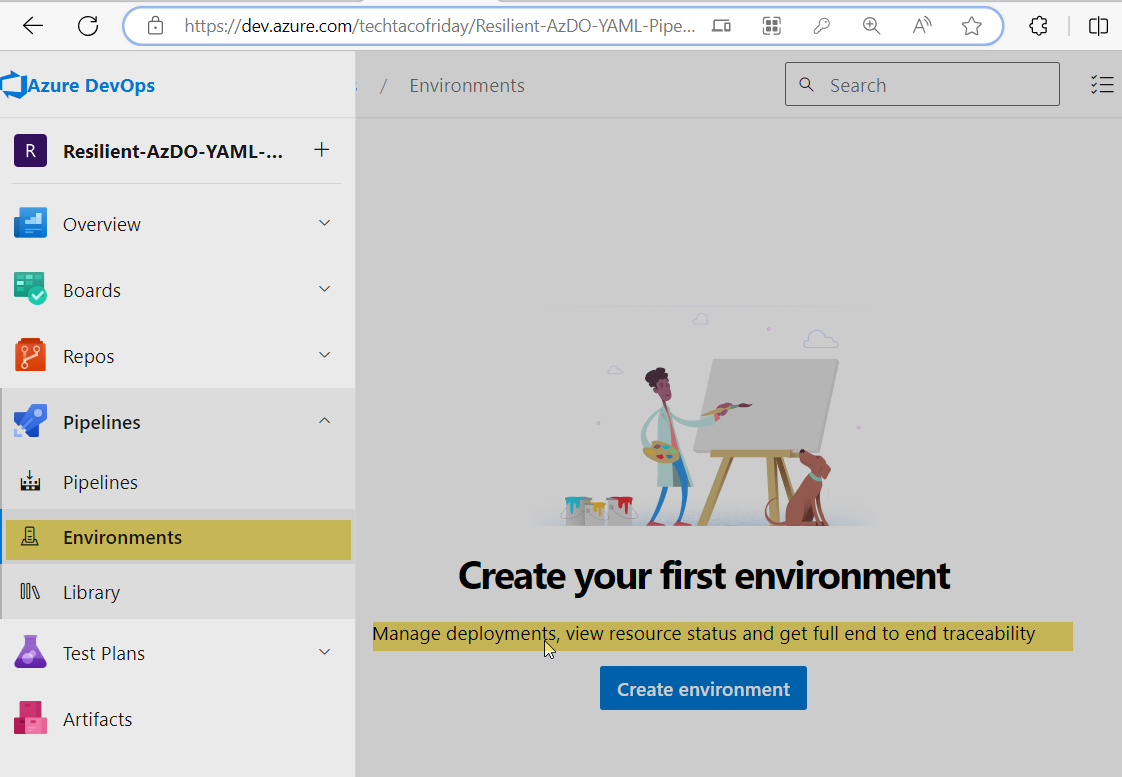
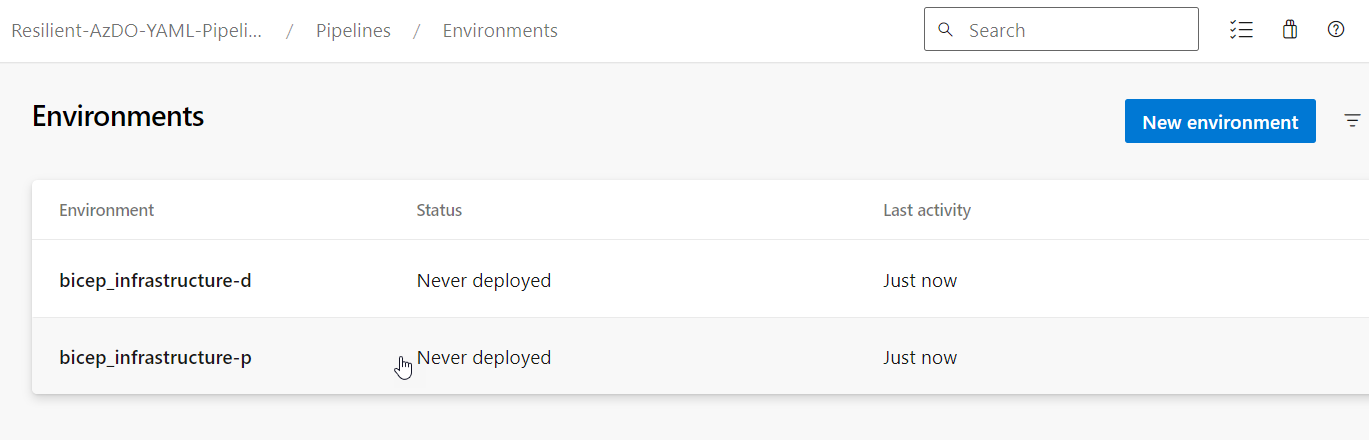
Section 7. AzDO Pipelines/Environments
Since the word "Environment" can be interpreted in the different contexts, I want to make perfect clear that I'm talking about this ...
Azure DevOps Pipelines: Environments and Variables: "Environments provide the ability to monitor deployments that are occurring, provide an additional level of security, and assist in tracking the state of work items in terms of where they have been deployed to. "
Again, we are going to create two AzDO Pipelines/Environments, one to deploy our Bicep Infrastructure towards Development and another towards Production, hence...
We are now ready to create our BICEP pipeline... let's get into it!
Section 8. The YAML file (aka Pipeline)
On the next part of the article I'll explain the code but ...
Without further do I present you, the yaml file (aka yaml pipeline)
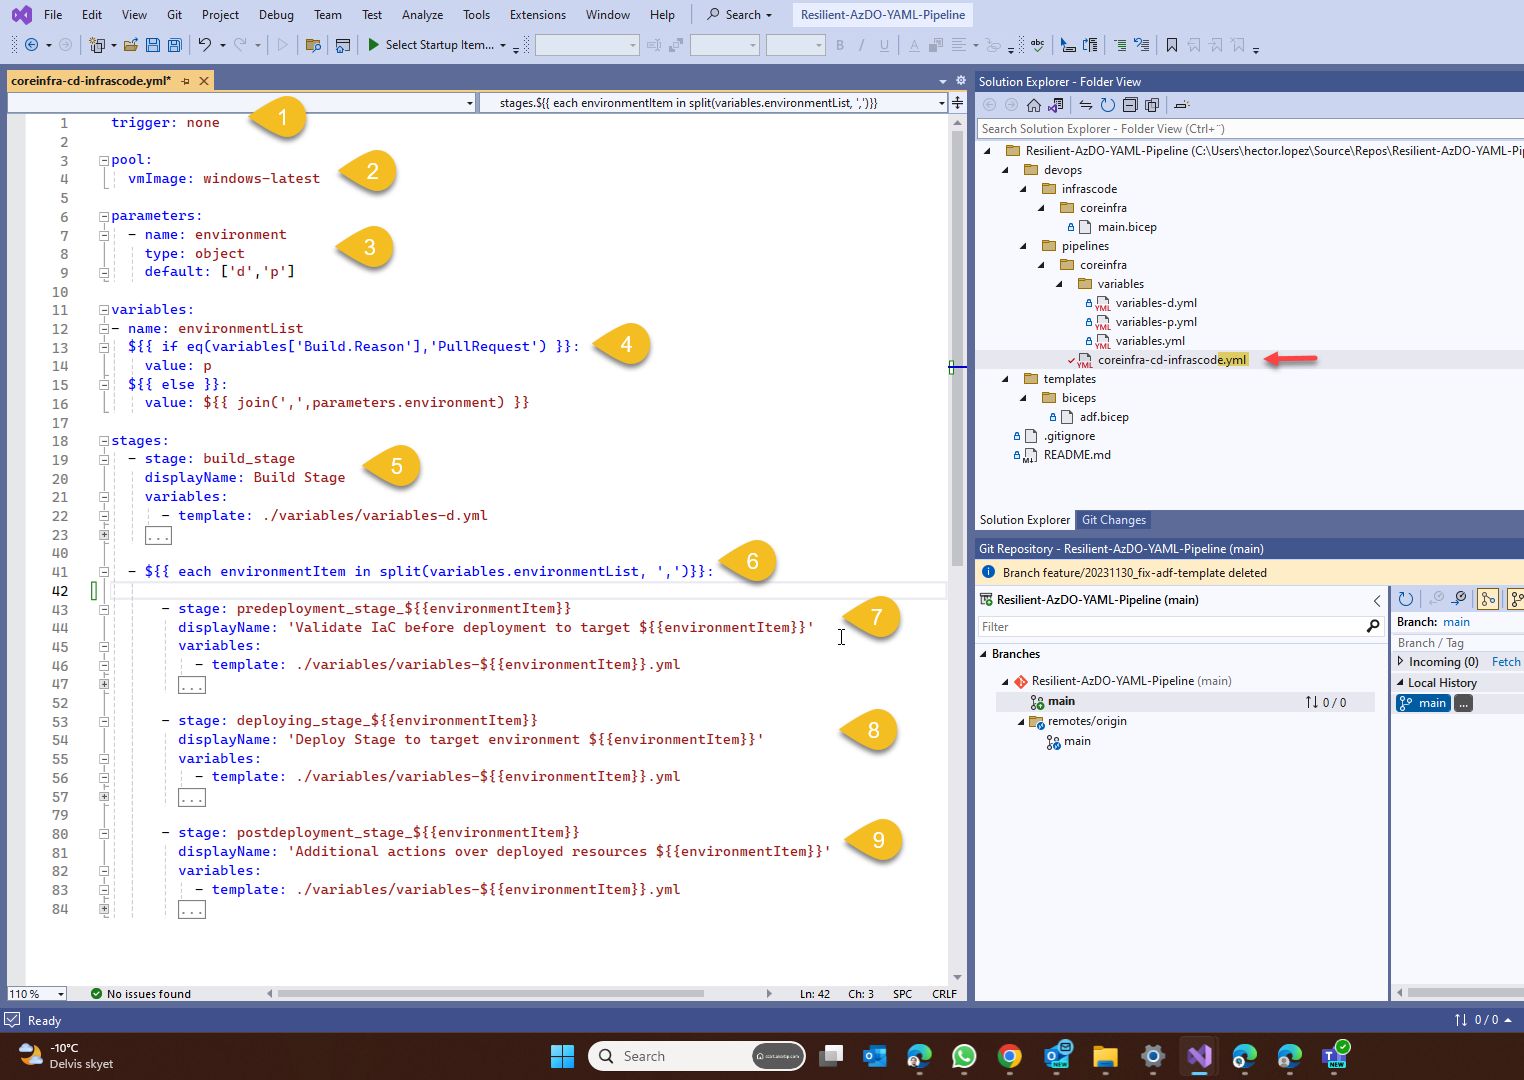
- Trigger. As the name suggests, if defined, it will monitor a condition and execute the pipeline when the condition is meet, in this case, I setting as none to allow me to manually trigger the pipe for educational purposes.
- Pool. More precisely, this is indicating which Agent pool do you want to use; an agent pool in a nutshell is a collection of VM's created to provide compute power for your pipeline. By using windows-latest I'm indicating that the VM's should have the latest version of Windows OS (Azure Pipelines agents)
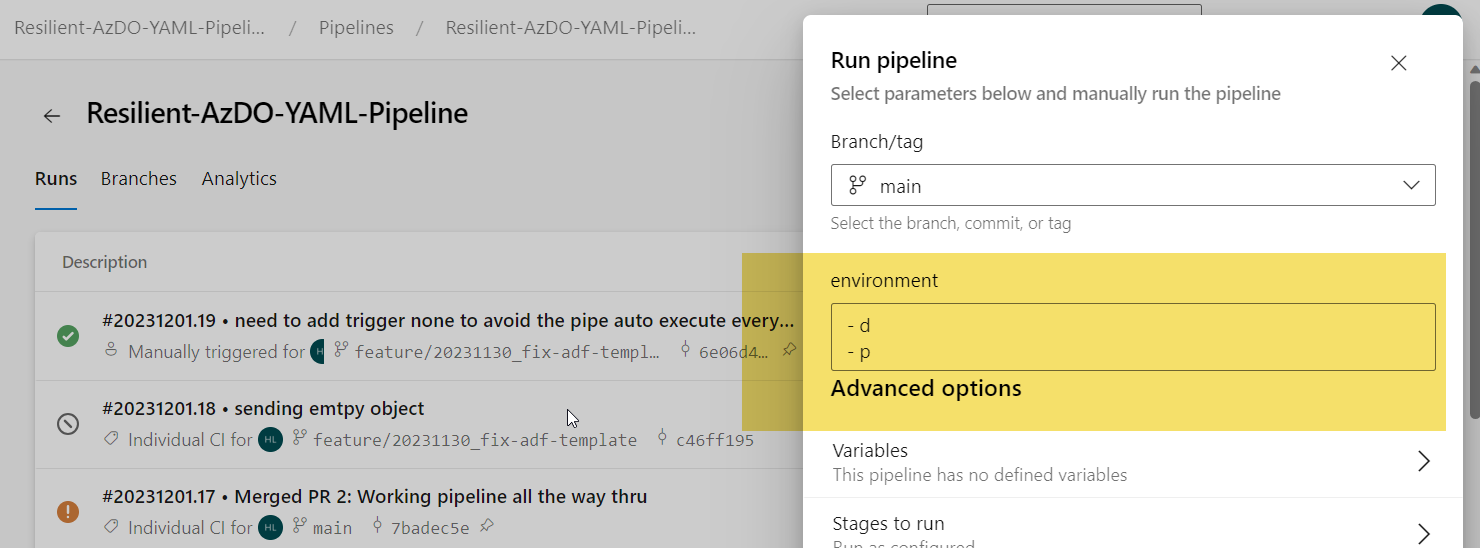
- Parameters. When you create a pipeline based on this yaml file, it will show you this input parameter like this, this allow me to configure my pipeline to target one or many environments sequentially
- Variables. I'm doing a little trick here that will allow me to automatically trigger the pipeline towards production when a Pull-request is made to main branch, as shown in the diagram, this is the expected behavior.
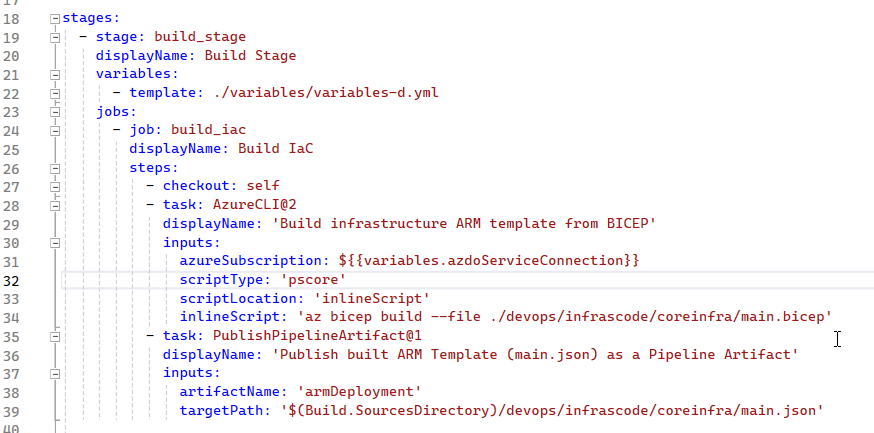
- Build Stage. Usually means to compile a program. However, it can also mean to create the deliverables of a project from the sources called “artifacts” that I will use on subsequent stages. In my example, I'm building from a BICEP file into it's deployment JSON ARM template.
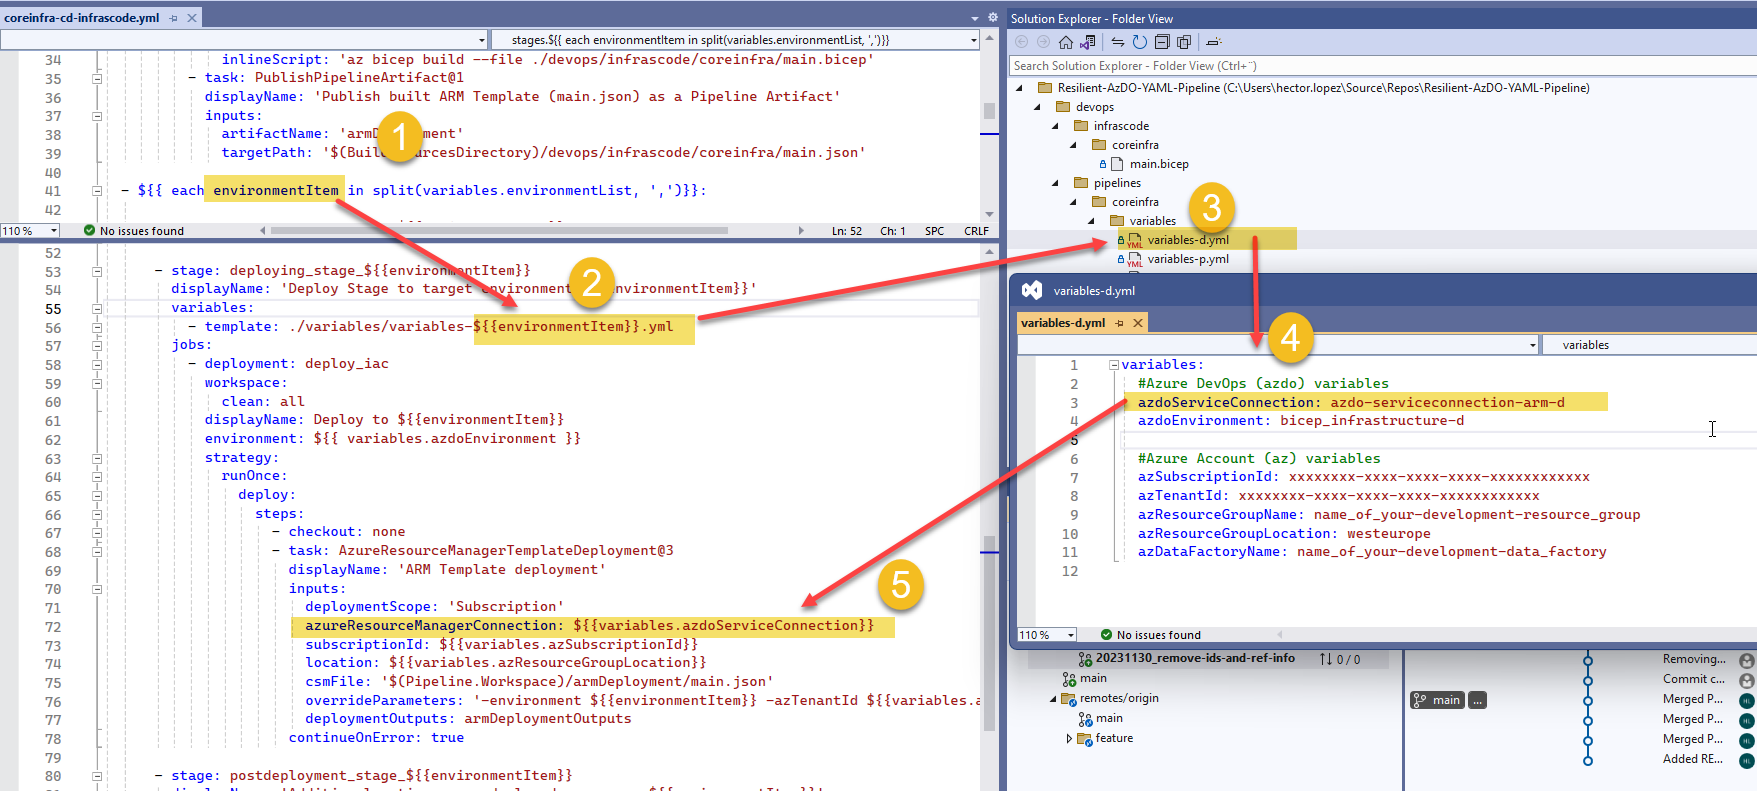
- Environment iterator. With this iterator, we will take the environment code for each environment we want to deploy and use the right variable file just by following a simple naming convention! variables-<<environment code>>
- Pre-Deployment stage. Not to much happening on my example, I just put a simple place holder to simplify the pipeline, however, in a real-world example, I use run a what-if analysis of my ARM template to detect un-expected changes before I actually change anything; perhaps adding Unit Testing here could be a good idea!

- Deployment stage. Perhaps this is the most important part you need to understand! So, the iterator takes each of the values in the input parameter environments (1), in our example the first element is a d for development, then we dynamically build the template name (2), with this we include the variable file that correspond with our target environment (3), this file contains all environment specific variables we are going to use in our deployment and we use those variables (5) ... awesome, don't you think!!!!
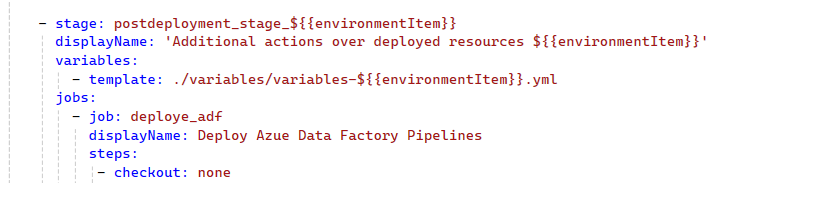
- Post-Deployment stage. Nothing much happening here either, this is another placeholder, nonetheless, very important... for me, I use this stage to publish Azure Data Factory datasets, pipes, triggers, etc. to live mode. (much more to come on this 😉)
Call to action
It is your turn now...
I prepare the following video showing you how to create run the pipeline
This is the end of the series, I hope you find it useful, next week I'm going to use this very same pipeline and create a couple of additional resources using BICEP, check it out and subscribe.


